Search This Blog

Showing posts with label DIY. Show all posts

Tuesday, February 7, 2012

Cranberry Raisin Bran Muffins....... Made From Raisin Bran Cereal!


So despite my best efforts.... my kiddos don't always eat everything I buy.  I am a big believer in trying new things.... especially when it comes to healthy foods.  I bought a few boxes of Raisin Bran Crunch a little while back hoping that the kiddos would dig right in and love it, I mean they love raisins, they love pretty much any kind of cereal, so they would love this right?  Yeah... wrong.  My hopes of replacing a few other boxes of what I call junky cereals that the kiddos love ( you know the ones with marshmallows, chocolate pieces,  and tons of sugar? ) with these boxes of raisin bran were a complete bust.  Now while the mama loves and eats this cereal.... I am only one person.  So I found myself standing in a blank gaze at the row (yes you read right row, as in 5 boxes) thinking to myself.... " Yeah now what?"

Well I present you with a solution.  Cranberry raisin bran muffins... made from yes you guessed it..... the raisin bran.  I baked up a batch of these... and behold, they all got eaten. In fact not only did they all get eaten.. but I was met with open hands begging for another and another.   So high five to me for figuring out a way to use up the once unwanted cereal..... because I hate wasting food, have I mentioned that before?  I believe I have.  Also... these muffins are mommy friendly too, as in friendly to your waistline.  They have only 120 calories in each.  A certain popular coffee chain who's name I won't mention... cough, cough, Starbucks, cough.... has a similar Cranberry Bran Muffin, and it has almost 500 calories in one!


Cranberry Raisin Bran Muffins

Ingredients

1 1/2 cups raisin bran cereal
1 cup low fat buttermilk
1/4 cup unsweetened applesauce
2 tablespoons canola oil
2 tablespoons molasses
1/2 cup splenda granulated sweetner
1 teaspoon vanilla extract
1 large egg
1 cup all purpose flour
1/12 teaspoons baking soda
1 teaspoon baking powder
1/3 cup dried cranberries

Directions

Preheat the oven to 350 degrees.  Lightly spray 12 muffin cups with nonstick baking spray.

In a medium bowl, whisk together the first 8 ingredients (raisin bran through egg) set aside.

In a large bowl, combine the flour, baking soda, baking powder and cranberries and stir.  Create a well in the center and add the raisin bran mixtures.  Using a large spoon or spatula, stir just until the dry ingrediens are moistened.

Spoon the batter evenly into prepared muffin tins filling each cup 2/3 of the way full.

Bake for 15 to 18 minutes or until the center springs back when lightly touched.  Cool for 5 minutes before removing to a wire rack to cool.

Thursday, February 2, 2012

Wednesday, February 1, 2012

Age Old Comfort Food.... Meatloaf


Ah..... meatloaf.  Love it or hate it?  I happen to hate every meatloaf I have ever tried... except mine.  Funny thing about this age old comfort food..... this was a staple for dinners in the 1950's.  In fact it stayed that way well through the 70's before falling out of favor (probably had something do with those darn leg warmers and work out wear everyone was running around in in the 80's).  No seriously jokes aside.  My eight year old begged me for over a week to make meatloaf.  I don't know what took me a week..... it's so easy and quick.  It being filling and cheap doesn't hurt either.  Another plus is you probably have all the ingredients in your kitchen right now.  This recipe is a mix from my mother in laws recipe that my husband grew up on and my own twist.  We always have it with mashed potatoes and green beans, isn't that written somewhere in stone?  That you have to have green beans and mashed potatoes with meatloaf?  No?  Huh coulda sworn it was.....


Nancy's Meatloaf with A Twist of Sarah

Ingredients

1 pound of lean ground beef
1 cup of crushed saltine crackers
1 small onion chopped
1 egg beaten
1 8oz can of tomato sauce
1 tsp. onion powder
1 tsp. Worcestershire sauce
1 tbsp. garlic salt
salt and pepper
dried parsley
ketchup

Directions

Preheat oven to 350 Degrees.

In a large bowl using your hands.... mix ground beef with cracker crumbs, egg and onion.
Next add the onion powder, Worcestershire, and garlic salt.  Mix well with hands.

Sprinkle with salt and pepper ( how much is totally up to your preference) and parsley (again your preference as to how much). Add a small amount of Ketchup to the mix... about 1/4 a cup.

Add tomato sauce to the mixture a little at a time mixing up with your hands as you do this.  Now if you feel like it has a good consistency and you haven't' used the whole can than that is fine.  I just do it until it feels right.  It should be clumpy together.. but moist not dry.

Place in a standard loaf pan.  Press down until it is flattened and even in the pan (but do not smash it too much) just enough until the pan is filled.  Brush the top with a good layer of ketchup.

Bake in the oven for 45 min.  Serve with mashed potatoes and green beans.  Keep the ketchup handy for additional dipping... as the byrd family does!

Tuesday, January 31, 2012

Simple and Traditional Split Pea Soup.....


Traditonal Split Pea Soup.... is if it ain't broke than why fix it?  I know there are a lot of spin offs on split pea out there... but I still favor the traditonal slow cooked in a large heavy pot or dutch oven with a ham bone.  Call me old fashioned.... but there is just something so simple and perfect about cooking it that way.  I made a big heaping pot for dinner tonight.  Needless to say.... while I was hoping for leftovers for tommorrow, I don't think there will be any. 


Funny that this Jar that was sitting quietly on my pantry shelf would make a big helping of hearty, comforting goodness.........


Split Pea Soup Recipe

Ingredients

2 tbsp. butter
1 medium onion, diced
3 stalks celery, chopped
3 carrots, sliced or diced
2 bay leaves
1 tablespoon fresh thyme
Salt & pepper to taste
2 cups of dried split peas
6 cups broth of choice. I prefer Chicken Broth.
1 smoked ham hock or ham bone (omit if you are a vegetarian) You could also use 1 cup of diced ham.

Directions

In a large, heavy pot (about 4 quarts in size) melt the butter and add the vegetables, and cook until the onions are soft. Add the bay leaves, thyme, and salt & pepper and stir. Add the split peas and stir to coat with the spices and the butter, then add the broth and the ham hock/ham bone. Turn heat down to low, cover, and simmer for a hour. Check on the soup. It should be creamy and soft, but not so thick that it's like a pea loaf. If it's getting too thick, add a little more broth. The soup is ready when the peas are soft, anywhere from 1 1/2 to 3 hours.


The final result.... waiting to be dished up!

Saturday, January 28, 2012

Chorizo.... Beyond the Eggs


We here at the byrdie house love Chorizo and eggs.  There is just something about the Mexican pork sausage that has such a robust flavor.  Most chorizo is seasoned with smoked paprika and chili's which make it satisfying even on it's own.  I had some chorizo sitting in the fridge and decided that I wanted to cook it with something other than eggs. 
This Chickpea and Chorizo soup is so easy and yummy.  It makes for the perfect meal on chili nights.  Not to mention as it simmers your whole house will smell like heaven.  The Byrdie family is eating this as I type.


Chickpea and Chorizo Soup
makes about 2 quarts

12 ounces chorizo sausage
1 large white onion, chopped and thinly sliced
4 stalks of celery, chopped
6 cloves garlic, minced
2 tablespons fresh thyme, minced
1 can chickpeas, drained and rinsed
1 can Great Northern beans, drained and rinsed
4 cups chicken broth
1/2 cup white wine
1/4 cup Italian parsley, chopped
1 tablespoon olive oil
Salt and pepper

Chop or crumble the chorizo into bite-size pieces. Film a heavy pan lightly with olive oil and put over medium-high heat. Cook the chorizo for about five minutes or until it starts browning and and smoking. Lift out and drain on a plate lined with paper towels.

Pour a little more olive oil into the pan and turn the heat to medium. Add the onions and celery and cook for about ten minutes, or until soft. Add the garlic and thyme and cook for another couple minutes, or until golden and fragrant. Add the chorizo back in, along with the chickpeas and beans. Cook all together for a minute, stirring, until the beans are well coated with the onions and oil.

Add the broth and white wine and bring to a boil. Lower to a simmer and add the parsley and olive oil. Simmer for about half an hour, or until slightly reduced. Season to taste with salt and pepper before serving.

Friday, January 27, 2012

Do It Yourself..... Valentines Day Crafts - Photo Cards


Here's another easy and adorable idea.  I love this little project because you can probably find a lot of the supplies needed around your home.  Card stock, construction paper, baking papers and a few photos are all you need.  Make sure your kiddos help with this one.  This would also make a great Valentines gift for the grandparents.

Wednesday, January 25, 2012

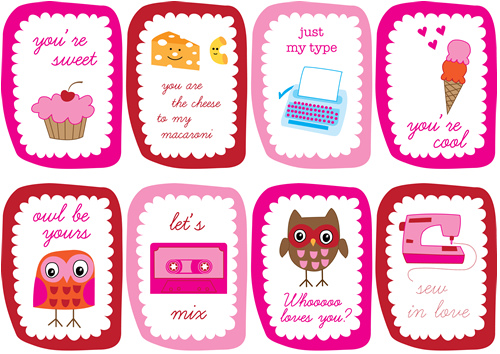
Do It Yourself..... Valentines Day Crafts- Printer Friendly Valentine Cards


I am not a fan of store bought Valentines.  Every year I usually print out Valentine cards and then the kiddos and I assemble little treats to go with them.  This year however..... I now have two kiddos in school.  Between the two of them that is 48 Valentine Cards I need to print. What does this mean?  It means that there Valentines are gonna use up all of my ink!  So here is a little round up of my favorite and yes printer friendly Valentines for your little ones to hand out.  Yay for the conservation of ink!

1.  Sweetheart Classroom Cards - Bunny Cakes


2. Robot Valentines - Cottage Industrialist


3. Adorable Mini Valentines - Amy is the Party


4. Zebra Cards - Bunny Cakes


5. Owl Valentines Day Card - Living Locurto

Baked Apple Streusel Pancake Bars......


Can you tell Breakfast is my favorite meal?  Do you ever make pancakes and then have leftover batter???  This is a great way to use it up!  Talk about a win win right? 


Baked Apple Streusel Pancake Bars
Yields: 20 Bars


2 cups all-purpose flour
2 teaspoons baking powder
1 teaspoon baking soda
1/2 teaspoon kosher salt, or slightly less table salt
3 tablespoons sugar
2 large eggs, lightly beaten
2 3/4 cups buttermilk (whole milk can be substituted without any problems)
3 tablespoons unsalted butter, melted
1 small apple, diced into 1/2" pieces
2 cups Granola ( I like  apple cinnamon granola)

For Topping:
1/4 cup all-purpose flour
1/4 cup brown sugar, firmly packed
3 tablespoons butter, melted
1 teaspoon cinnamon
1/2 teaspoon freshly grated nutmeg

Grease and Parchment your choice of baking dish. We used 2 8"x8" pans (for the straight sides), but a large pyrex baking dish should work just fine! Set aside. Mix dry ingredients and stir with a wire whisk. Add wet ingredients and stir until just barely combined. Add in Granola and apples, stirring just until coated. You want your batter to be lumpy with out any dry spots.
Pour into prepared pans. Preheat oven to 400 degrees Fahrenheit. Allow batter to rest in pans while oven is coming to temperature and mix Streusel topping ingredients in a small bowl. Drizzle over pancake mixture with a fork, or spoon into a zip top bag and use like a pastry bag, making thin, even lines. Bake for 12-15 minutes, when touched, it should spring back gently. Remove from oven and remove from pan (thanks parchment paper!) and place on wire rack to cool slightly. If you wish, brush tops with 2 more tablespoons of melted butter for a great shine.
These are great eaten the morning of, or as you have need throughout the week. You can also wrap individual portions and freeze them. Just take them out the night before, (or if you forget, pop them in the microwave to defrost) and let them sit on the counter so your breakfast is ready as you bolt out the door!
They're great for a brunch where people might find themselves eating away from the table, serve them with a little lemon curd, apple butter, or small amount of maple syrup! Enjoy!


Thanks to The Kitchin

Frozen Fruit & Yogurt Roll ups......


So I have bags and bags of frozen fruit in my freezer.  Some are store bought, a lot are from myself buying up berries when they are at a great price and freezing them.  I also have a ritual of making a big fruit salad to serve with something freshly baked on Sunday mornings.  I take the left over fruit salad and put in a gallon sized ziplock and freeze it.   This makes it easy for me later to take the bag out and dump it into my blender for my smoothies!  I also love to do this because it avoids waste.  (Little known fact about me... nothing bothers me worst than fruits and veggies being wasted or being thrown away.)  Now all of this is just fine and dandy... I love having a surplus of frozen fruit.  But I found myself getting tired of only using it for the same old things.  Either it goes in a smoothie, baked in a muffin of some type or added to the batter of our pancakes/waffles.  When I came across this recipe I almost did a back flip.  No, I'm just kidding... I can't do a back flip, but honestly I was over joyed.  So alas I share with you this awesome recipe:

Frozen Fruit & Yogurt Rollups
(from Once a Month Mom)

Ingredients:
10 flour tortillas
1-1/2 cups Vanilla yogurt
frozen berries
1/2 cup sugar
1 T. cinnamon
spray butter

Directions:
Mix cinnamon & sugar on a large plate. Spray one side of a flour tortilla with butter, covering the entire surface, then place butter side down on plate with cinnamon and sugar. Press down and move around, coating one side of tortilla in cinnamon and sugar.
Next, place tortilla, sugar side down on another plate. Spread about 1/8 cup of yogurt (I just eyeball this, I don’t measure) in a strip a little left of the center. Add some frozen berries (I bought a bag of mixed, strawberries, black berries, raspberries and blue berries- I cut the strawberries up). Roll the tortilla tight and place on a large cookie sheet.
Continue the process with the rest of the tortillas.
Place the cookie sheet in the freezer for about 2 hours. Remove from freezer, cut each tortilla in half and place them in a large zip lock bag and put them back in the freezer for storage.
To Serve:
Take out of bag and eat immediately. You can let them thaw a little bit, but if you let them thaw too long, they’re mushy, but can be eaten that way too.
Variations: you can try this with different flavors of yogurt and different fruits. Strawberries and bananas would be good…..just be sure to cut the strawberries up, a whole strawberry is hard to eat when frozen.

Tuesday, January 24, 2012

Do It Yourself..... Valentines Day Crafts - Upcycling a Dixie Cup....


Here is a super cute and frugal idea for your little one to hand out to classmates.

Simply print out the adorable vintage inspired paper cup wraps here.


Print and cut out enough wraps to cover your paper cups.  Tape the covers around each cup.  Attach a red pipe cleaner to the top of each cup by poking a hole in each side of the cup and feeding the pipe cleaner through it.  Lastly fill each cup with conversation hearts.  Let your kiddo pass these out to there classmates!  There are so much cuter than the traditional store bought Valentines.


Thanks to: Free Pretty Things For You

How to Make Buttermilk Quick Bread with 10 Variations.....


I was so excited when I came across this recipe.  I love basic recipes that you can manipulate and change! 


Basic Buttermilk Quick Bread Makes one loaf
2 cups (10 oz) all-purpose flour
1/2 cup (4 oz) white sugar
1 1/2 teaspoons baking powder
1/2 teaspoon baking soda
1 teaspoon salt
1 cup (8 oz) buttermilk
1 large egg
1/4 cup (2 oz) unsalted butter, olive oil, or vegetable oil
Heat the oven to 350°F. Grease or spray with nonstick cooking spray a standard 9x5 loaf pan.
Whisk together the flour, sugar, baking powder, baking soda, and salt in a medium mixing bowl. Melt the butter, if using. Whisk it in a separate bowl with the buttermilk and the egg.
Pour the liquid ingredients over the dry ingredients. Gently stir and fold the ingredients until all the flour has been incorporated and a shaggy, wet batter is formed. Be careful not to over-mix.
Scrape the batter into the prepared pan and pat it into the corners. Bake for 45-50 minutes. When finished, the loaf should be domed and golden, and a toothpick inserted into the center should come out clean. Let the loaf cool in the pan for 15 minutes before removing and slicing.
Wrap baked loaves tightly in plastic wrap and store at room temperature. Baked loaves can also be wrapped in plastic and aluminum foil and frozen for up to three months.
Basic Variations:
• Sugar can be reduced to a tablespoon for more savory breads.
• Up to half the flour can be substituted with an alternative flour.
• Replace the buttermilk with a mix of yogurt and milk or milk and a squeeze of lemon.
• Use up to 1 1/2 cups fruits, nuts, olives, cheese, or other ingredients, added to the dry ingredients.
• Use 1-3 teaspoons of herbs or spices, added to the dry ingredients.


10 Variations:
1. Cranberry-Walnut Loaf (pictured above) - 1 c. dried cranberries, 1/2 cup toasted and chopped walnuts, 1 tsp vanilla, zest from one orange
2. Apple-Cinnamon Loaf - 1 c. diced apples, 1 tsp cinnamon, 1/2 cup toasted and chopped nuts
3. Cherry-Almond Loaf - 1 c. dried cherries, 1/2 cup toasted and chopped almonds, 1 tsp almond extract
4. Blueberry Loaf - 1 c. fresh or frozen blueberries, 1 tsp vanilla, zest from one lemon
5. Ginger-Orange Loaf - zest from two oranges, 1/4 cup minced crystallized ginger, 1 tsp cinnamon, pinch of cloves, pinch of nutmeg
6. Herbed Sun-dried Tomato and Cheese Loaf (pictured below) - reduce sugar to 1 T, 1/2 c. grated cheese, 1 tsp oregano, 1/2 tsp thyme, 2 T minced sun-dried tomatoes
7. Onion-Dill Loaf - reduce sugar to 2 T, one minced onion cooked until soft, 1 T minced fresh dill
8. Pesto Loaf - reduce sugar to 1 tablespoon, 1/4 c. pesto, 1/2 c. shredded parmesan cheese
9. Spicy Jalapeno Loaf - reduce sugar to 2 tablespoons, 1/4 cup minced jalapeno peppers, 1 c. shredded cheddar cheese, 2 tsp chili powder
10. Irish Soda Bread Look-Alike Loaf - reduce sugar to 1/4 cup, 1 T caraway seeds, 3/4 cup raisins


Source:
The Kitchin

Saturday, January 21, 2012

Do It Yourself..... Valentines Day Crafts- Teacher gift


Here is another easy, cute idas for a Valentines Day Teacher gift brought to you by Love The Byrd:


Materials
  • Card stock
  • Marker
  • Tube of lotion
  • Double-sided tape
Instructions
  1. Trace your child's hand on card stock. Cut out the traced hand and use it as a template to make a second hand.
  2. Write a message with marker. Affix the hands to a tube of lotion and add card stock hearts with double-sided tape.

    Suggested Messages:
    "You deserve a hand!"
    "Hands down, you're the best."
    "I've got to hand it to you!"

Thursday, January 19, 2012

Do It Yourself..... Valentines Day Crafts


The mama bird is guilty of something.  I love the Holiday's and take full advantage of crafting, baking and making gifts and decor.  So with Valentines Day coming up... I am already making plans.  I will be sharing here on the byrd a daily DIY (do it yourself) Valentines Day idea.  Today I thought I would start with this adorable Sweet Pea gift.  This would be awesome for a teacher gift or a dear friend.  Get the kiddos in on this one because what could be cuter than a flower pot painted by a five year old?


Materials
  • Kitchen sponge
  • Scissors
  • Three-inch clay pot
  • Acrylic paint
  • Potting soil
  • Plastic baggie
  • Packet of sweet pea seeds
  • Ribbon
Instructions
  1. Cut heart shapes from a kitchen sponge with the scissors.
  2. Using acrylic paints, sponge-print a design onto the pot. Allow to dry.
  3. Place potting soil, seeds and planting instructions into the pot and wrap the whole thing in a ribbon

Sunday, August 14, 2011

DIY Marshmallow Treat Pops......


Just found these marshmallow treat pops and I can't get over how cute they are!  I am defenatly gonna whip up some of these for the Haylei Birds Birthday Party in December!

For the Pink Marshmallow Pops:

You’ll need:
marshmallows
pink Candy Melts
pink M&M’s (or similar)
white nonpareils
lollipop sticks
Directions:
1. Insert the lollipop sticks into the marshmallows & set aside.
2. Melt the candy in the microwave, according to package instructions.
3. Dip each marshmallow (with stick) into the melted candy, until about ½ of the marshmallow is coated.
4. Sprinkle with nonpareils and top with a pink M&M while candy coating is still warm.


Courtesy of Hostess with the Mostess